
Se nonostante tutti gli sforzi, non riesci a condividere via samba con ‘external storage’ il tuo server Windows probabilmente ti manca php-smbclient
Windows 2022 – Remove DHCP Failover Partner
Per rimuovere il parner ho fatto in questo modo:
Vai sul server DHCP che vuoi mantenere in vita, click con il destro sullo scope interessato e fai ‘Deconfigure Failover’. Questo cancella lo scope ‘dal server parner’ e rimuove la relazione.
Poi vai su IPV4 e properities e vai sul tab “Failover” e premi ‘Delete’. Questo rimuove la relazione tra i due server.
Ubuntu 24.04 – Estendere hard disk su VM
Segui questi passi:
Aumenta di quanto server il disco su Vmware
Fai ripartire la VM
Usa “cfdisk” via terminale sulla vm per effettuare il resize della partizione
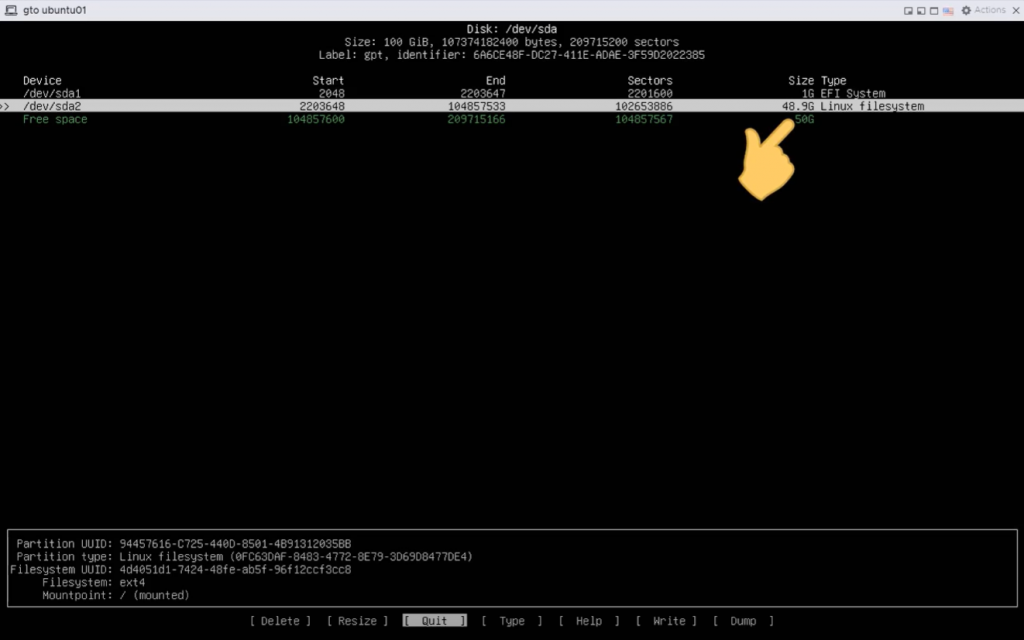
Usa resize sulla partizione da allargare.
Successivamente vai su write
Ultimo step da shell usa il comando ” sudo resize2fs /dev/sda2″
Controlla con ‘df’ la nuova dimnsione della partizione.
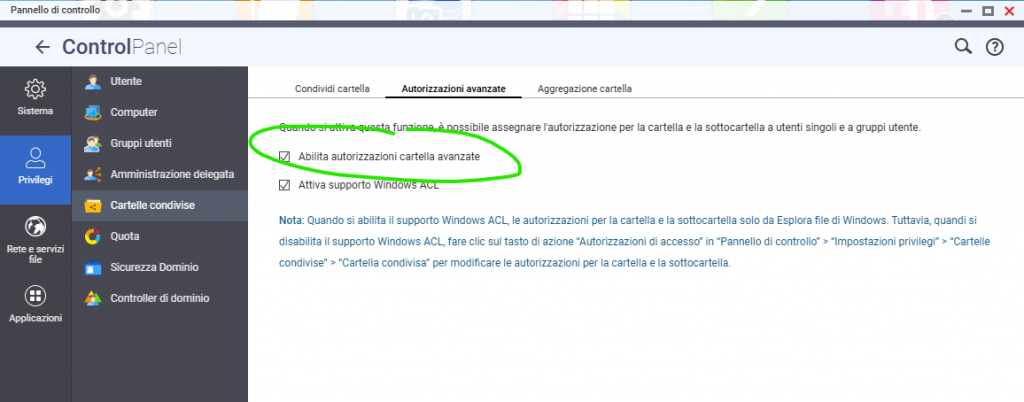
Qnap – Permessi particolari sulle cartelle nidificate.
Questo si applica quando abbiamo un utente, anche AD, che deve accedere in full control ad una cartella che è posizionata dentro ad una cartella in read-only per lui.
Occorre abilitare le “autorizzazione avanzate” come in figura
Poi nella GUI di Qnap nelle cartelle condivise dare accesso all’utente, come in figura togliendo “Applica le modifiche ai file e alle cartelle secondarie” per ovvi motivi.
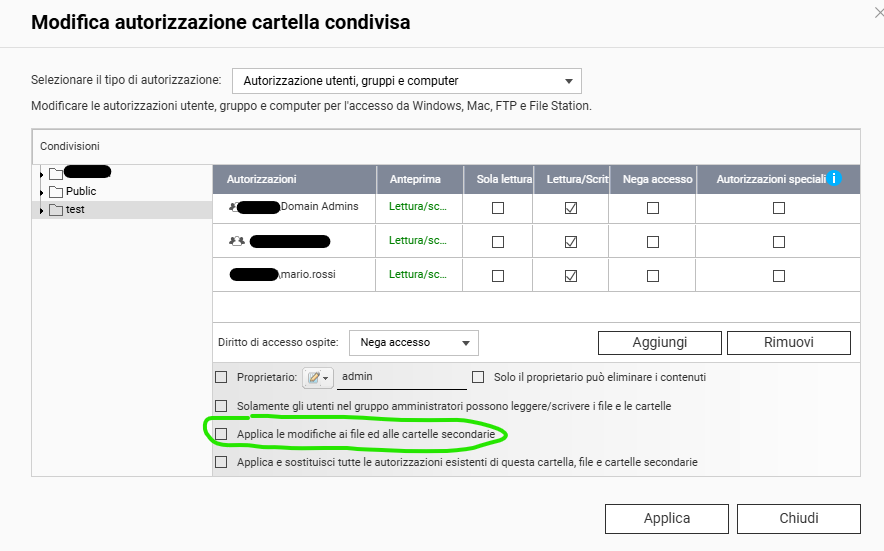
successivamente via windows dare i permessi come segue per le cartelle ‘read only’:

Dare ‘Full Control’ alle cartelle che Mario Rossi deve avere il pieno accesso.
Vmware Vcsa8 – Password di root scaduta
Se hai installato un vcsa8 piu’ o meno di default, la sacdenza delle password e’ impostata a 90 giorni. Siccome di solito le cose vanno nel verso giusto (almeno nei primi 90 giorni) potrebbe capitare che un giorno entri nel vcenter e vedi un paio di errori del tipo “la password di root e’ in scadenza” in giallo e un’altro in rosso “La password di root e’ scaduta”. In realta’ non c’e’ nulla che non funzioni, ma se provi ad entrare nella console del vcsa, quella su porta 5480 per capirci, ti da un errore del genere “Exception in invoking authentication handler user password expired”.
Meno male che risolvere e’ una minchiata: entri in ssh sull’ip del vcsa con la vecchia password.. ci pensa un po’ e poi lui stesso si rende conto che sta dicendo una minchiata e ti dice che la passeword di root e’ scaduta, ti chiede la vecchia password e ti fa inserire la nuova, due vole come al solito. A questo punto puoi entrare nella parte web e correre e cambiare la scadenza da “90 giorni” a “mai”.
Vmware – Blank screen editando una VM – Solved
Potrebbe succedere che, mentre provi ad editare una VM ti si presenti una schermata cosi’:
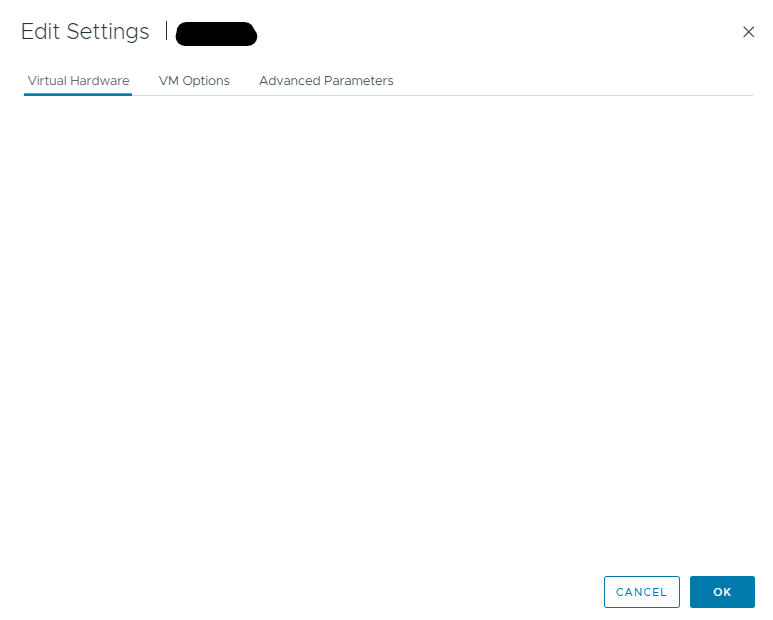
..esatto non si vede nulla. Il problema facilmente risolvibile è dipeso dall’aggiornamento del virtual hardware della VM. Semplicemente, schedula oppure spegni e aggiorna il virtual hardware al livello della tua installazione Vmware
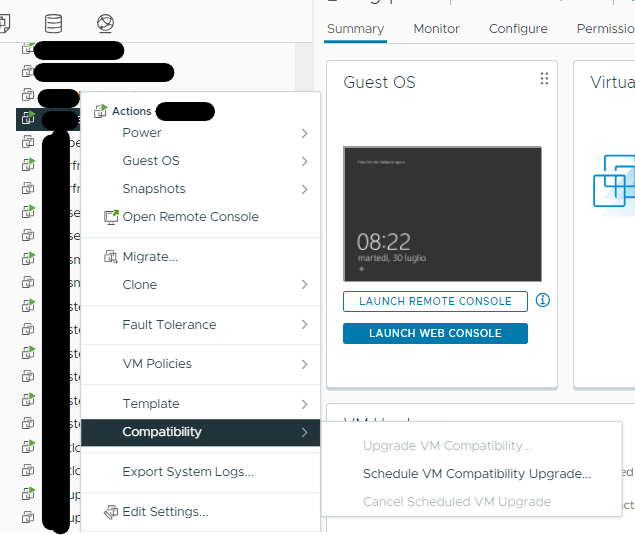
Riavvia la vm e potrai editare i settings della vm.
Sessioni telnet che si sconnettono
Se una sessione telnet sta in idle per un pò di tempo, è normale che qualche dispositivo di rete tagli la connessione di rete. Normalmente questo accade quando un client si connette ad un server AS400 e l’operatore si assenta per qualche tempo, quando prova a lavorare sul PC dopo il primo enter viene forzato da rifare il login. Questo ovviamente stressa l’operatore. Per ovviare a questo problema si allunga il timeout tcp delle sessioni del firewall, che nel caso Sonicwall sono a 15 minuti e si modificano a 60 minuti. Però puo’ accadere che la sessione venga interrotta da qualche device che non è sotto il nostro diretto controllo. A questo punto si può ricorrere al tcp-keepalive sul server stesso. La soluzione è stata risolta su una macchina linux. Occorre soltanto modificare tre parametri del kenel:
net.ipv4.tcp_keepalive_time=60 # Quanti secondi passano prima di inviare una probe
net.ipv4.tcp_keepalive_intvl=30 # Quanti secondi passano prima di inviare una probe se non ottengo risposta
net.ipv4.tcp_keepalive_probes=6 # Dopo quanti tentativi senza risposta avvisa l’application layer che la sessione è stata interrotta.
I valori scelti sono stati decisi dopo alcuni test. Potresti volerli modificare.
Make sure that any services that have a space in their path are enclosed in quotes
Con Windows 11 il wmic non funziona dunque apri una powershell con diritti amministrativi e incolla questo script:
Get-CimInstance Win32_Service | ForEach-Object {
$path = $_.PathName
if ($path -match ‘ ‘ -and $path -notmatch ‘^”.*”$’) {
[PSCustomObject]@{
Name = $_.Name
PathName = $path
}
}
} | Format-Table -AutoSize
Dovresti vedere un output di questo tipo: si vede bene chi ha spazi nella path senza avere le ‘virgolette’
ProfSvc C:\Windows\system32\svchost.exe -k UserProfileService -p
PushToInstall C:\Windows\System32\svchost.exe -k netsvcs -p
QNAPQVPNConnectionService C:\Program Files (x86)\QNAP\QVPN\QVPNConnectionTool.exe
QWAVE C:\Windows\system32\svchost.exe -k LocalServiceAndNoImpersonation -p
RasAuto C:\Windows\System32\svchost.exe -k netsvcs -p
RasMan C:\Windows\System32\svchost.exe -k netsvcs
Vmware :: NFS Storage :: inaccessibile dopo power failure
In questo caso si deve procedere in questo modo.
- De-registra tutte le VM che sono sopra NFS. Se non ce ne sono meglio cosi’.
- Prendi nota di come si chiama il datastore, l’ip del server NFS, il tipo di NFS, l’export della directory del server NFS
- Smonta il datastore
- Crea un nuovo datastore con lo stesso nome, dovresti riuscirci con le info che ti sei annotato prima.
- Eventualmente ri-registra le VM che trovi sul datastore.
Symantec Messaging Gateway: installa il certificato SSL
Se non hai generato il CSR dal SMG, dovrai creare un file .pem del certificato fatto con questa procedura:
Convertire .key PKCS#8 int PKCS#1
openssl rsa -in newkey8.pem -out newkey1.pem
unire .crt+newkey1.pem -> certificato .pem da importare in SMG
Riassumendo, il file del certificato compresa la chiave RSA va importato ne tan “TLS & HTTPS Certificates“. Il file XXXX-CA-BUNDLE va importato nella tab “Certificate Authority”
ESEMPIO
Il file del certificato ha lo stesso nome del nome a dominio per il quale è stato richiesto, ad esempio www_sslcertificates_nl.crt,
- Salvare il certificato in una posizione accessibile dal gateway di gestione.
- Dal Centro di controllo, vai su Amministrazione > Impostazioni > Certificati .
- Fare clic sulla scheda Certificati TLS e HTTPS .
- Fare clic su Importa .
- Nella pagina Importa certificato , inserisci il percorso completo del certificato dal passaggio 1 o fai clic su Sfoglia per selezionarlo.
- Fare clic su Importa .
Ciò completa l’installazione del certificato personalizzato. Seguire i passaggi seguenti per installare anche i certificati root e intermedi.
- Scarica il pacchetto root e intermedio per il certificato. Salvarlo in una posizione accessibile da Symantec Messaging Gateway.
- Dal Centro di controllo, vai su Amministrazione > Impostazioni > Certificati .
- Fare clic sulla scheda Autorità di certificazione e quindi su Aggiorna .
- Nella pagina Aggiorna certificati CA , fare clic sul pulsante Sfoglia e accedere al percorso del file bundle dal passaggio 1.
- Fare clic su Aggiorna .
Tutti i passaggi di installazione del certificato sono stati completati. Assicurati che i file del certificato siano adeguatamente protetti e conserva un backup della chiave privata e del certificato in un luogo sicuro. Installa anche i certificati root e intermedi . Utilizza SSLCheck per verificare se il certificato è stato installato correttamente e garantisci una configurazione ottimale del certificato SSL con questi suggerimenti e impostazioni.
Non esitate a contattarci se avete problemi o messaggi di errore, saremo felici di aiutarvi!